lighting

Lighting - Building a Shot - DC Magazine Ad Feb 2012

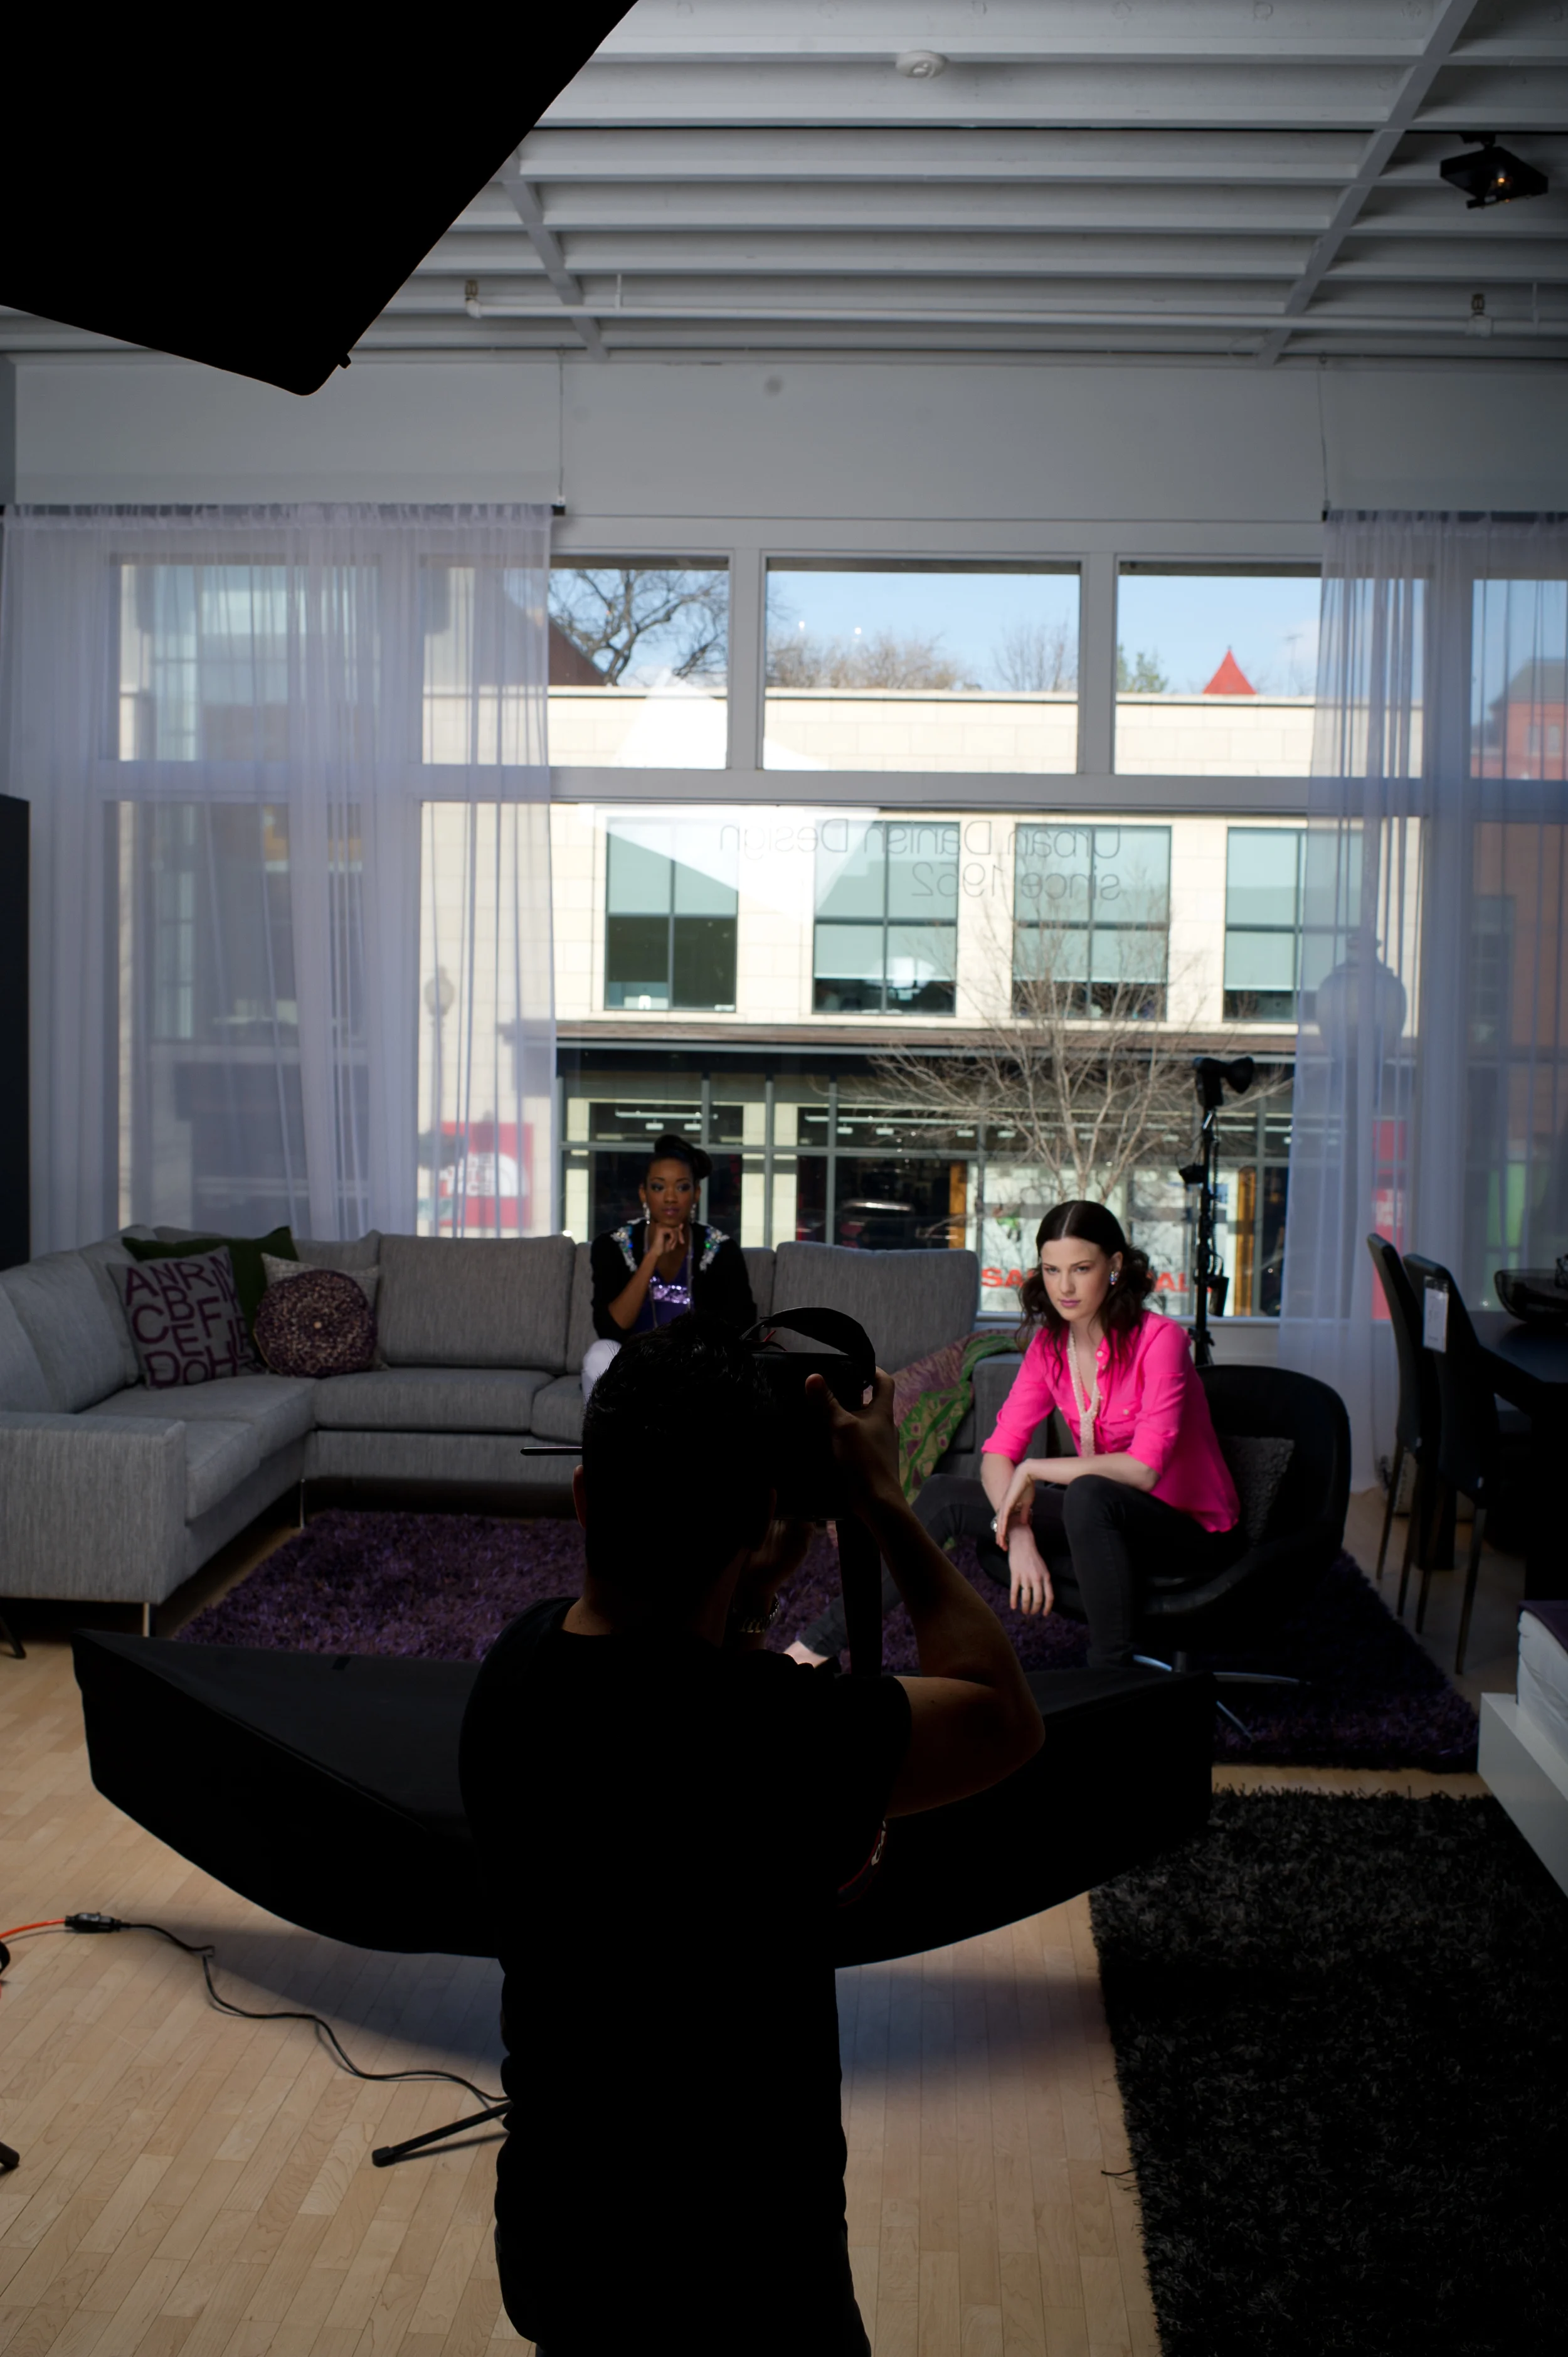
Last week, we did a new shot for my friend Moshe Zusman's new ad for DC Magazine. We used BoConcept in Georgetown as a location, as we wanted to have a relaxed, yet modern urban feel to the shoot. The concept was to create an image that looks like he's in the middle of a high fashion style shoot. We needed both the models in the background lit, wanted to see some of Georgetown outside, and even with the sweet Profoto heads lighting the models, we needed to light up Moshe in the foreground in a similar style. So we were balanced outside ambient, indoor ambient, 1000w/s studio lights and speedlights (and a couple of QFlashes too!) This isnt going to be a super long blog post, but I just wanted to go through the steps of starting off with your ambient light and building up the final shot by adding and tweaking the lights. We used Pocketwizard Multimaxes to control which lights were firing during our tests so we could adjust each light independantly to get it to the power and position we needed before moving on to the next light. These images are completely unmodified out of the camera.

_NHP7144.jpeg

We started off with approximately what we wanted the framing of the shot to be, locked the camera down on a tripod. We wanted some of the floor and some of the ceiling in the shot, so we went with the Nikon 35 f/1.4 and set the exposure for 1/250th (my max sync speed) at ISO 400 at f/8. This gave us a good starting point to build from and still gave us some flexibility if we needed to open up some shadows (by using a slower shutter speed) or power down the effect of the flash (by closing our aperture more). The sun outside was going in and out of cloud cover, so we knew that if we needed a darker outside exposure, we could wait a few seconds and grab our shot then.

_NHP7149.jpeg

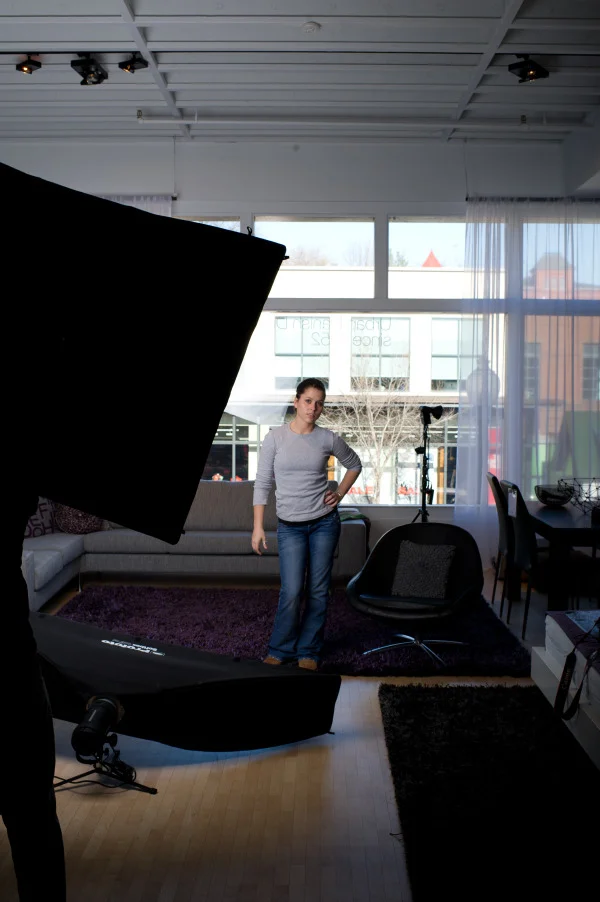
 Here our beautiful assisstant/model Becca Watkins was our test subject for the power and position for our key light (a 4X6 foot softbox with a Profoto 1000 watt head).

_NHP7151.jpeg

Once our key was set to the position we wanted, we powered up the primary fill which was a 4 foot long strip light with another Profoto 1000 watt head.

_NHP7154.jpeg

Tweaked the power on the key once we moved some of our subjects that were finished with hair and makeup into the shot.

_NHP7155.jpeg

Turned on our fill (lower strip light). You can see how it opens up the shadow under the model's face and adds some serious POP!

_NHP7166.jpeg

Brought Moshe in to see what kind of light we'd be working with on him in the foreground, since we had our base light set in the back for the girls.

_NHP7177.jpeg

Grabbed a SB900 with a 24" Lastolite Ezybox as a key camera right (similar elevation to our key for the girls for consistancy) and added another SB900 up high on camera right to give him a little kick.

_NHP7193.jpeg

Since we had our primary key and fills set, it's time to start popping in some hair lights and kickers to add some tone to the image. Here Moshe is setting the power for one of the three Q Flashes we used in the final shot. We wanted most of our lights to be visibile in the shot to give the impression that it was a "behind the scenes" image from an actual shoot.

_NHP7206.jpeg

Once we had the power set on the main hairlight to where we thought we wanted it, we turned on the other two Q Flashes and out other lights to get a sample of our final lighting setup. you can see that the hairlight/kicker on the right that Becca is adjusting is BLOWING the hair into oblivion. Also the light on the left is causing a little too much flair at the top of Asia's head, so we decided to raise the hairlights and reduce the power a bit on the right side to compensate.

_NHP7207.jpeg

Much better height for the lights, now just to dial down the power a bit and we'll be good!

_NHP7213.jpeg

Much better balance, hair isn't blown completely out, it has definition and detail. We're getting some nice rim light on our subjects and now it's time to bring in the final "model".

_NHP7298.jpeg

Here's the "final shot" with just a couple minor tweaks in Lightroom.

WPPI - Part 2 of 4 - Highlights and Shadows

Part 2 of 4 WPPI Post covers the cool new things coming out or that were new to me... and the kinds of things that I believe need to be left in the past or buried in the Nevada desert... (feel free to disagree with me in the comments, these are just my opinions!)

Highlights:

New Pocketwizards!
Photobucket
New FlexTT5 Transceiver
Photobucket
New MiniTT1 Transmitter

Pocketwizard launched a new line of their radio triggers this past week, and I can't wait to get my hands on them! I currently use Pocketwizard PWII's which are great, but have some limitations, especially in your level of control when it comes to adjusting the power of your flashes remotely. With the PWII system, I have to physically walk over to a flash and manually dial down the power I want out of it, then walk back to where I was and check to make sure it's giving me the level of lighting I want now. The other downside of the old system is that due to the very minute delay in the camera sending a signal out to the transmitter and to the receiver, it is near impossible to use a shutterspeed faster than 1/320 of a second and still have the entire image show the flash. With the new Pocketwizards that have now been announced, I can not only adjust the power of my flashes remotely, they now have a sort of ESP, allowing the flashes to fire when I want them to! You can plug the new models into your computer and actually adjust in nanoseconds, when you want your flashes to fire in relation to when your shutter release is pressed! This allows for faster shutter speeds, meaning you can actually dial down the ambient exposure much more easily. Don't want the Sun to be overpowering your flash burst? No problem! These new models will allow you to set your shutter now all the way up to 1/500 with full flash coverage and up to 1/8000 with the right type of flash and settings! Right now they just have Canon compatible models available, but as soon as the Nikon versions are released, you can bet I'll have a set on order!

New Lasolite Triflash bracket

Photobucket

New bracket (image taken from strobist.blogspot.com)

Another flash related accessory that caught my eye was this new tri-bracket from Lasolite. They aren't shipping quite yet, and they're a little pricy (the rep told me about $75) but imagine being able to throw three hotshoe flashes behind an umbrella or a softbox. You can get a ton of power in a very portable package with one of these, I'm probably going to wait for another company to make something similar though, I don't think I need one of these that badly to go blowing $75 on a piece of plastic. Especially when I can use gaffers tape to hold three flashes together if I need to for less than $1's worth of tape. What's funny about this, is I thought I had seen one of these before so I didn't think much of it at first, but then I realized that the last time I'd seen someone (Joe McNally) use so many flashes in an umbrella, it was MacGyver style!

Lasolite Trigrip (not sure if this is new, or just never saw it before)


Photobucket

I'd never seen these before, not exactly sure if they're new, but they really caught my eye when passing by Bogen's booth. They are a great portable diffusion/reflector system that collapses up into a little round sleeve that could fit in any bag. What makes these really unique though is the triangular shape and rubber grip that allows you to easily hold onto them or even prop them up against something. I have a circular reflector and skrim, but never use it because I don't want to hire an assistant just to hold diffusers. Maybe when I start shooting $100,000 weddings, I might hire a "diffusing assistant". Just kidding!


Nik Software Plugins for Aperture and Photoshop

Photobucket
Nik Software is VERY cool... control points are UH-MAZE-ZING!

I've played around with Capture NX (Nikon's RAW processing application) and wasn't a fan of it, but loved the concept of control points. What this is, is a really intelligent system that allows me to select a sky or a dress or a face and it can intelligently figure out where the object starts and ends. From there it allows me to adjust that specific area of an image without having to jump over into Photoshop or another standalone application. I never realized until I happened across the Nik Software booth that they partnered with Nikon in creating the U-point technology, and discovered they are now offering a great package for Apeture that includes the whole suite of plugins! I had been using Aperture since it's launch up until late last year, when I decided to tryout Lightroom and never bothered going through Aperture for my editing anymore. Now that Nik has a great offer as a plugin for Aperture, I just might start using it again...we shall see.

Shadows:

This is probably where I'll get a couple people to disagree or flat out hate what I'm about to say. Foam posing props (fake brick walls, foam columns to lean against, ect.) and painted muslin backdrops with unicorns or Greek columns belong in Sears or Walmart and/or 1992! I'm not saying you shouldn't use muslin/canvas/whatever backgrounds or that studio shooting is outdated, or that props are evil, but what I am saying is that I believe that professional photographers who do portraits using these types of tools should try to step it up and/or modernize their studios (try to differentiate from the bargin basement photography that Sears does). Backgrounds are critical for a lot of headshot and some portrait work, especially for corporate headshots, and for young children's portraits props are very useful in getting kids to sit still or stay in one place. The issue I have with the vendors (by my count there were AT LEAST 12 different backdrop vendors and 3 or more ugly foam prop vendors) at WPPI selling those types of studio accessories, was that they were trying to push stuff that looked like it came off a 2nd-rate TV show back in the late 80's or early 90's when everyone's hair was feathered and Tears for Fears was still selling out concert arenas. There are new technologies that now allow photographers to use whatever they want as a background (check out Virtual Backgrounds, very cool concept), by either optically or digitally inserting the background the way you want without spending hundreds upon hundreds of bucks on different colors of muslin to get different looks. There are real brick walls everywhere that don't look (and feel) like cardboard. I beg those out there that use those types of tools to look for alternatives that help you grow your business and separate yourself from the outdated competition.


Photobucket
I'm not necessarily recommending their product (still kind of complicated) but VERY cool idea...

Another thing that will probably get some people to disagree with me on is outsourcing of editing. There were quite a few companies (I saw at least 5) that are offering to take your digital files and then edit your images for you. Sounds like a real time saver, but in my opinion, in a digital age, what defines a photographer's style is not only the images he or she shoots through a lens, but also the way those images are edited and processed. I can understand doing outsourcing of photo editing for event or corporate photography where clean, sharp images with minimal artistic flare is what the client usually wants (depending on the type of client of course), but for weddings and portraits, I feel that outsourcing your editing is like buying tickets for a cruise and giving them to some stranger, it takes the fun out of it and you really don't get as much emotionally from the final results. There are times when some photographers might get overbooked and need to ask someone to help out with retouching on a couple select images, but I feel that's different, because the original photographer will already have done their basic edits that bring out their style in their work. Just a quick rant... sorry if it offends. Not trying to step on toes, just trying to give my opinion.